The mailbox post is the first thing people see when they come to your home.
Most people never think about it. It is just a post in the ground with a box on top. I had one like that. It was plain. It looked like nobody cared about it. I decided to change that.
I built a custom timber post from scratch. The address numbers are carved directly into the wood with a router. They are not painted on a plate. They are not plastic letters screwed on. They are cut into the wood and filled white so they are easy to read from the street. The post has a cross-arm for the address sign on one side. The mailbox sits on top. The base sits in white river rock with black stone accents.
People slow down when they drive past. Neighbors have knocked on the door to ask about it. That is how you know you got it right.
Step-by-Step
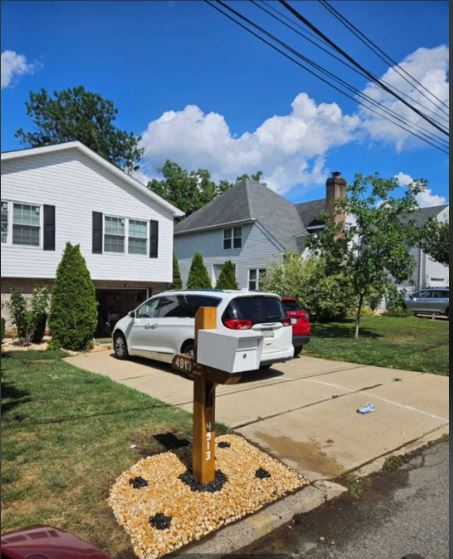
1. The finished post
A custom timber post with the address carved into the wood. A cross-arm sign that reads 4913. A white mailbox on top. White river rock and black stone at the base. Here is how it came together.
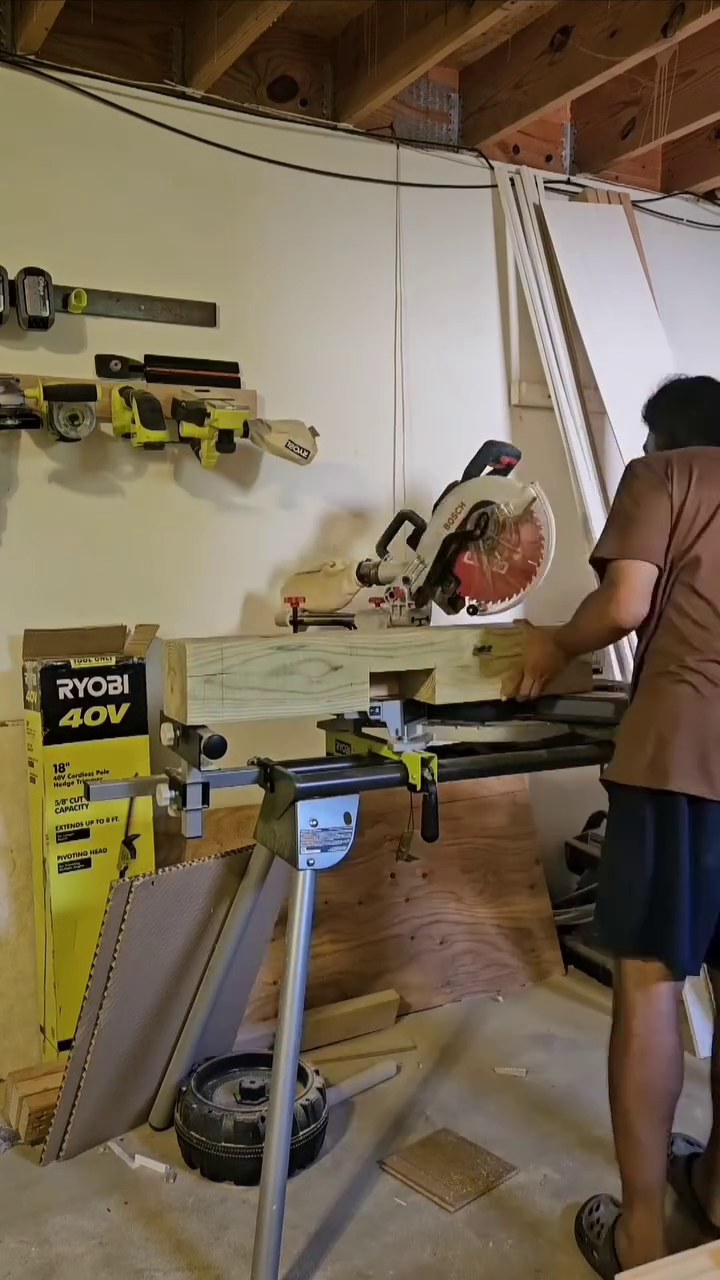
2. Starting at the miter saw
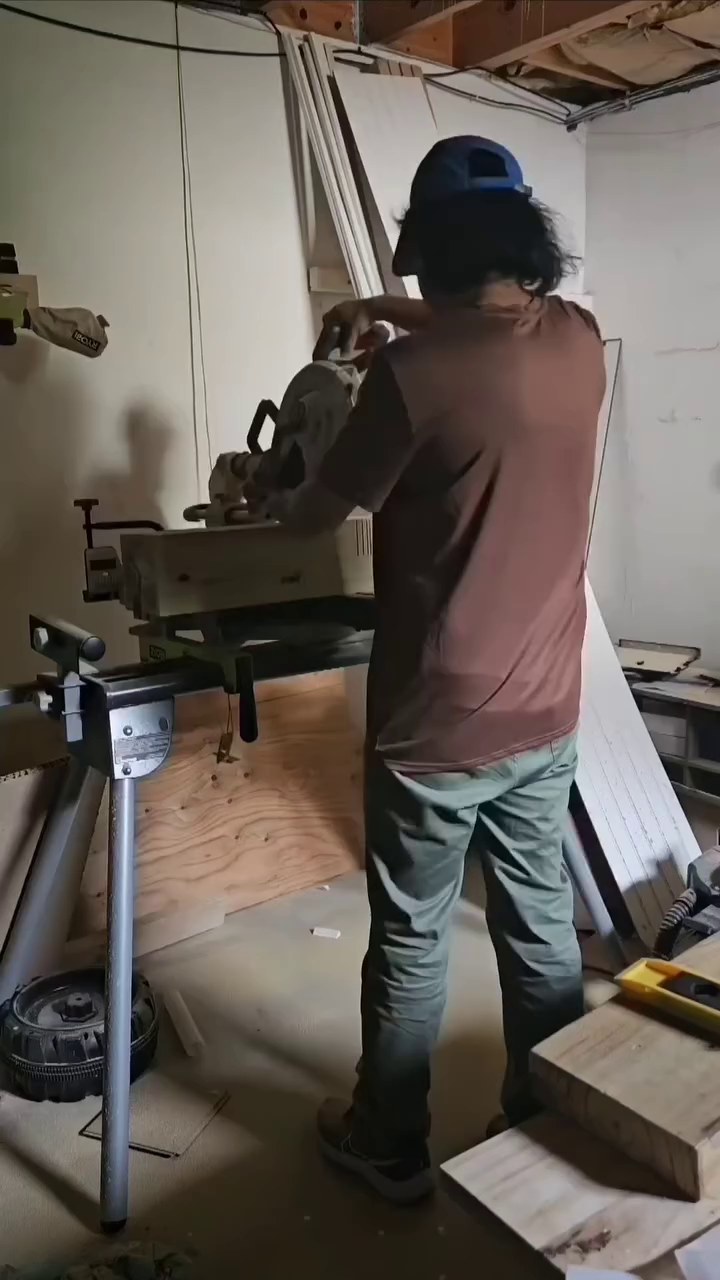
I cut the main post and arm pieces to rough length first. Getting the lengths right at the start is important. Once the post is in the ground, you cannot go back and trim it.
3. Ripping the post to width
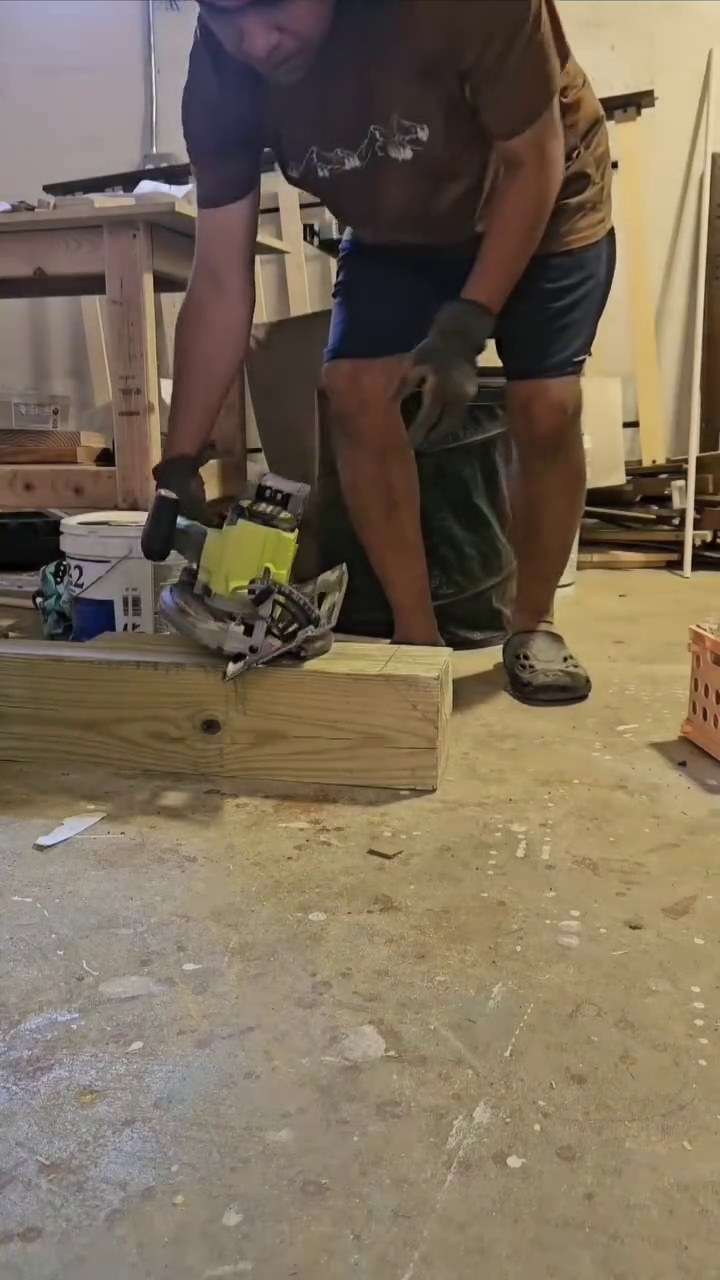
I used the circular saw to cut the lumber down to the final width. Working on the floor with a long piece like this, you need a steady hand and a straight guide line.
4. Carving the numbers
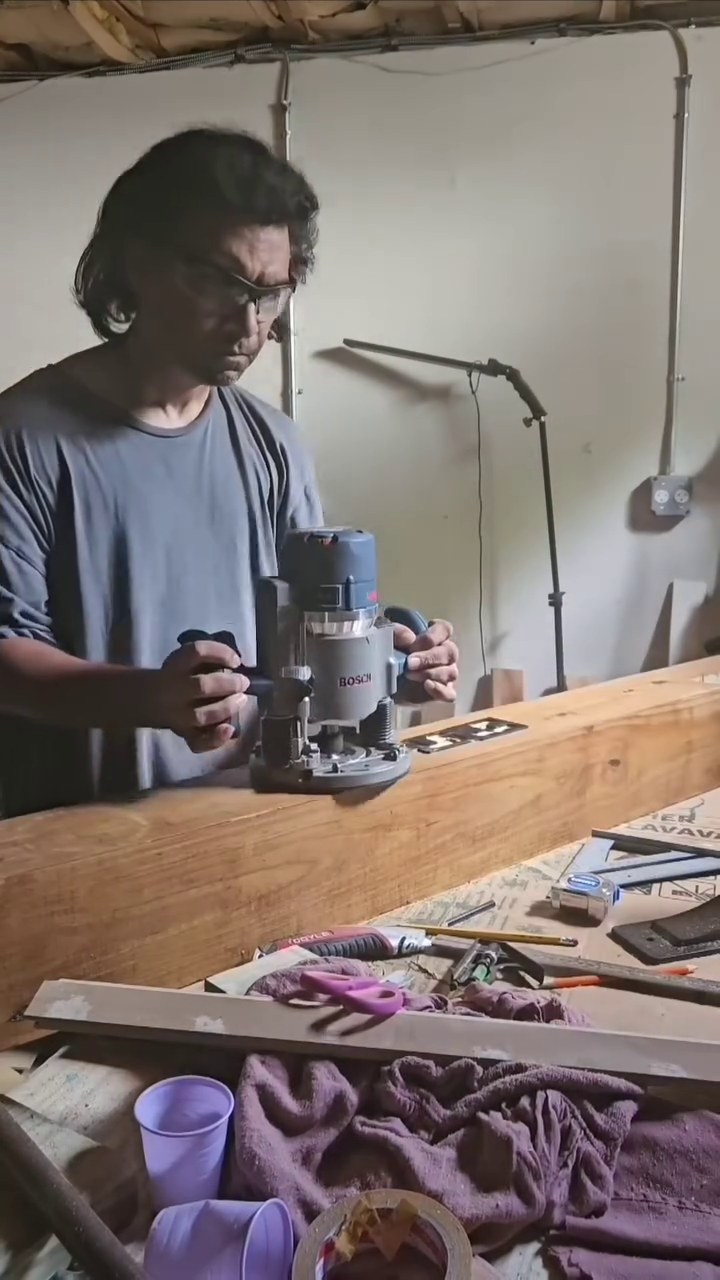
I used the Bosch router to carve the address numbers — 4913 — directly into the face of the wood. Not a sticker, not a plate, cut right into the grain. There was no fixing a mistake once the bit touched the wood, so I was careful.
5. The numbers filled with epoxy
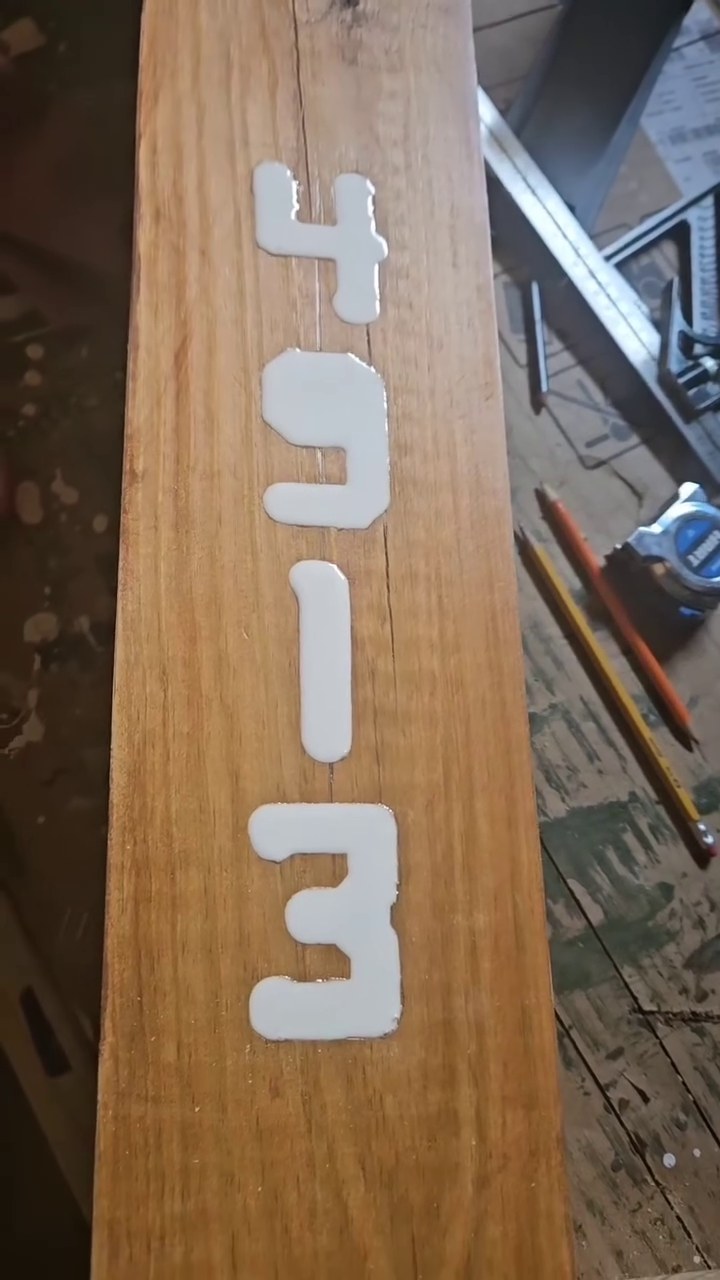
After carving, I poured liquid white epoxy into the numbers and waited for it to harden. Epoxy fills the carved grooves cleanly and stays solid. Against the warm color of the wood the contrast is sharp. You can read them clearly from the street.
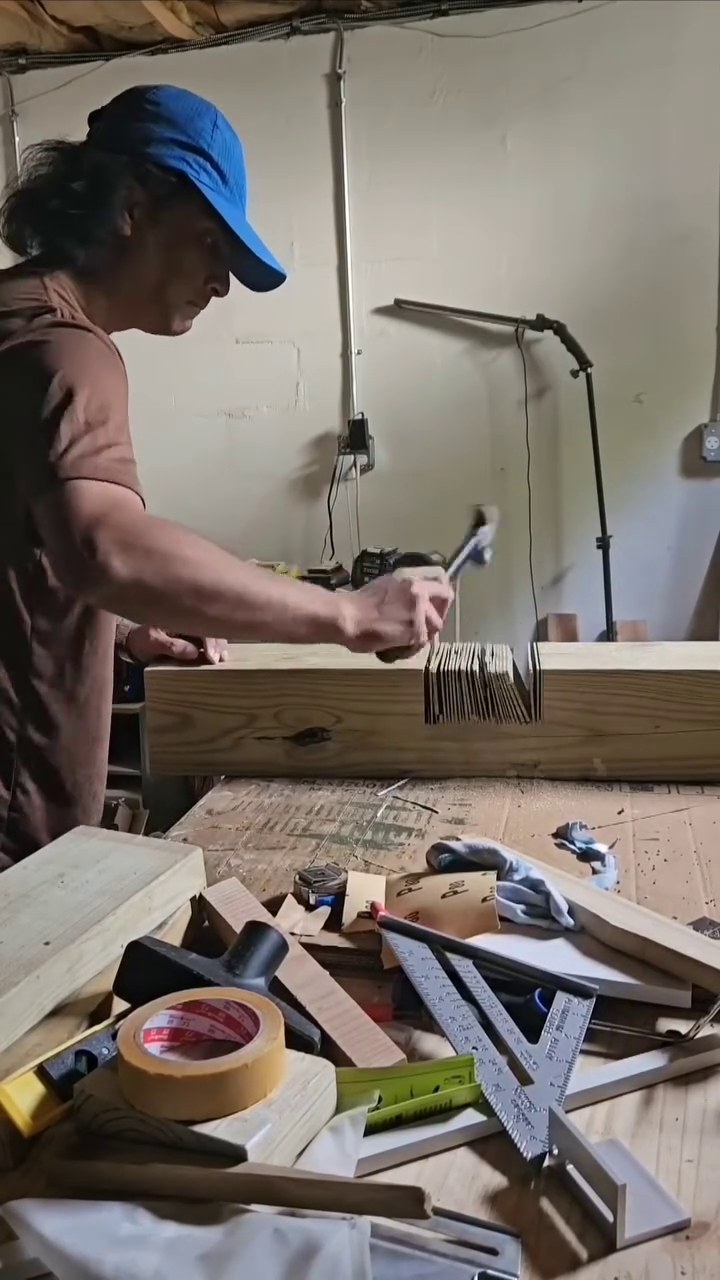
6. Finishing the surface
I wire brushed the whole post before any stain or sealer. It cleans up rough spots from the routing and gives the wood a nice texture. It is a slow step but it shows up in the final result.
7. The cross-arm cuts
Back at the miter saw for the cross-arm pieces. The arm needs to sit level against the post. Even a small angle looks wrong when you see it outside every day, so I took my time.
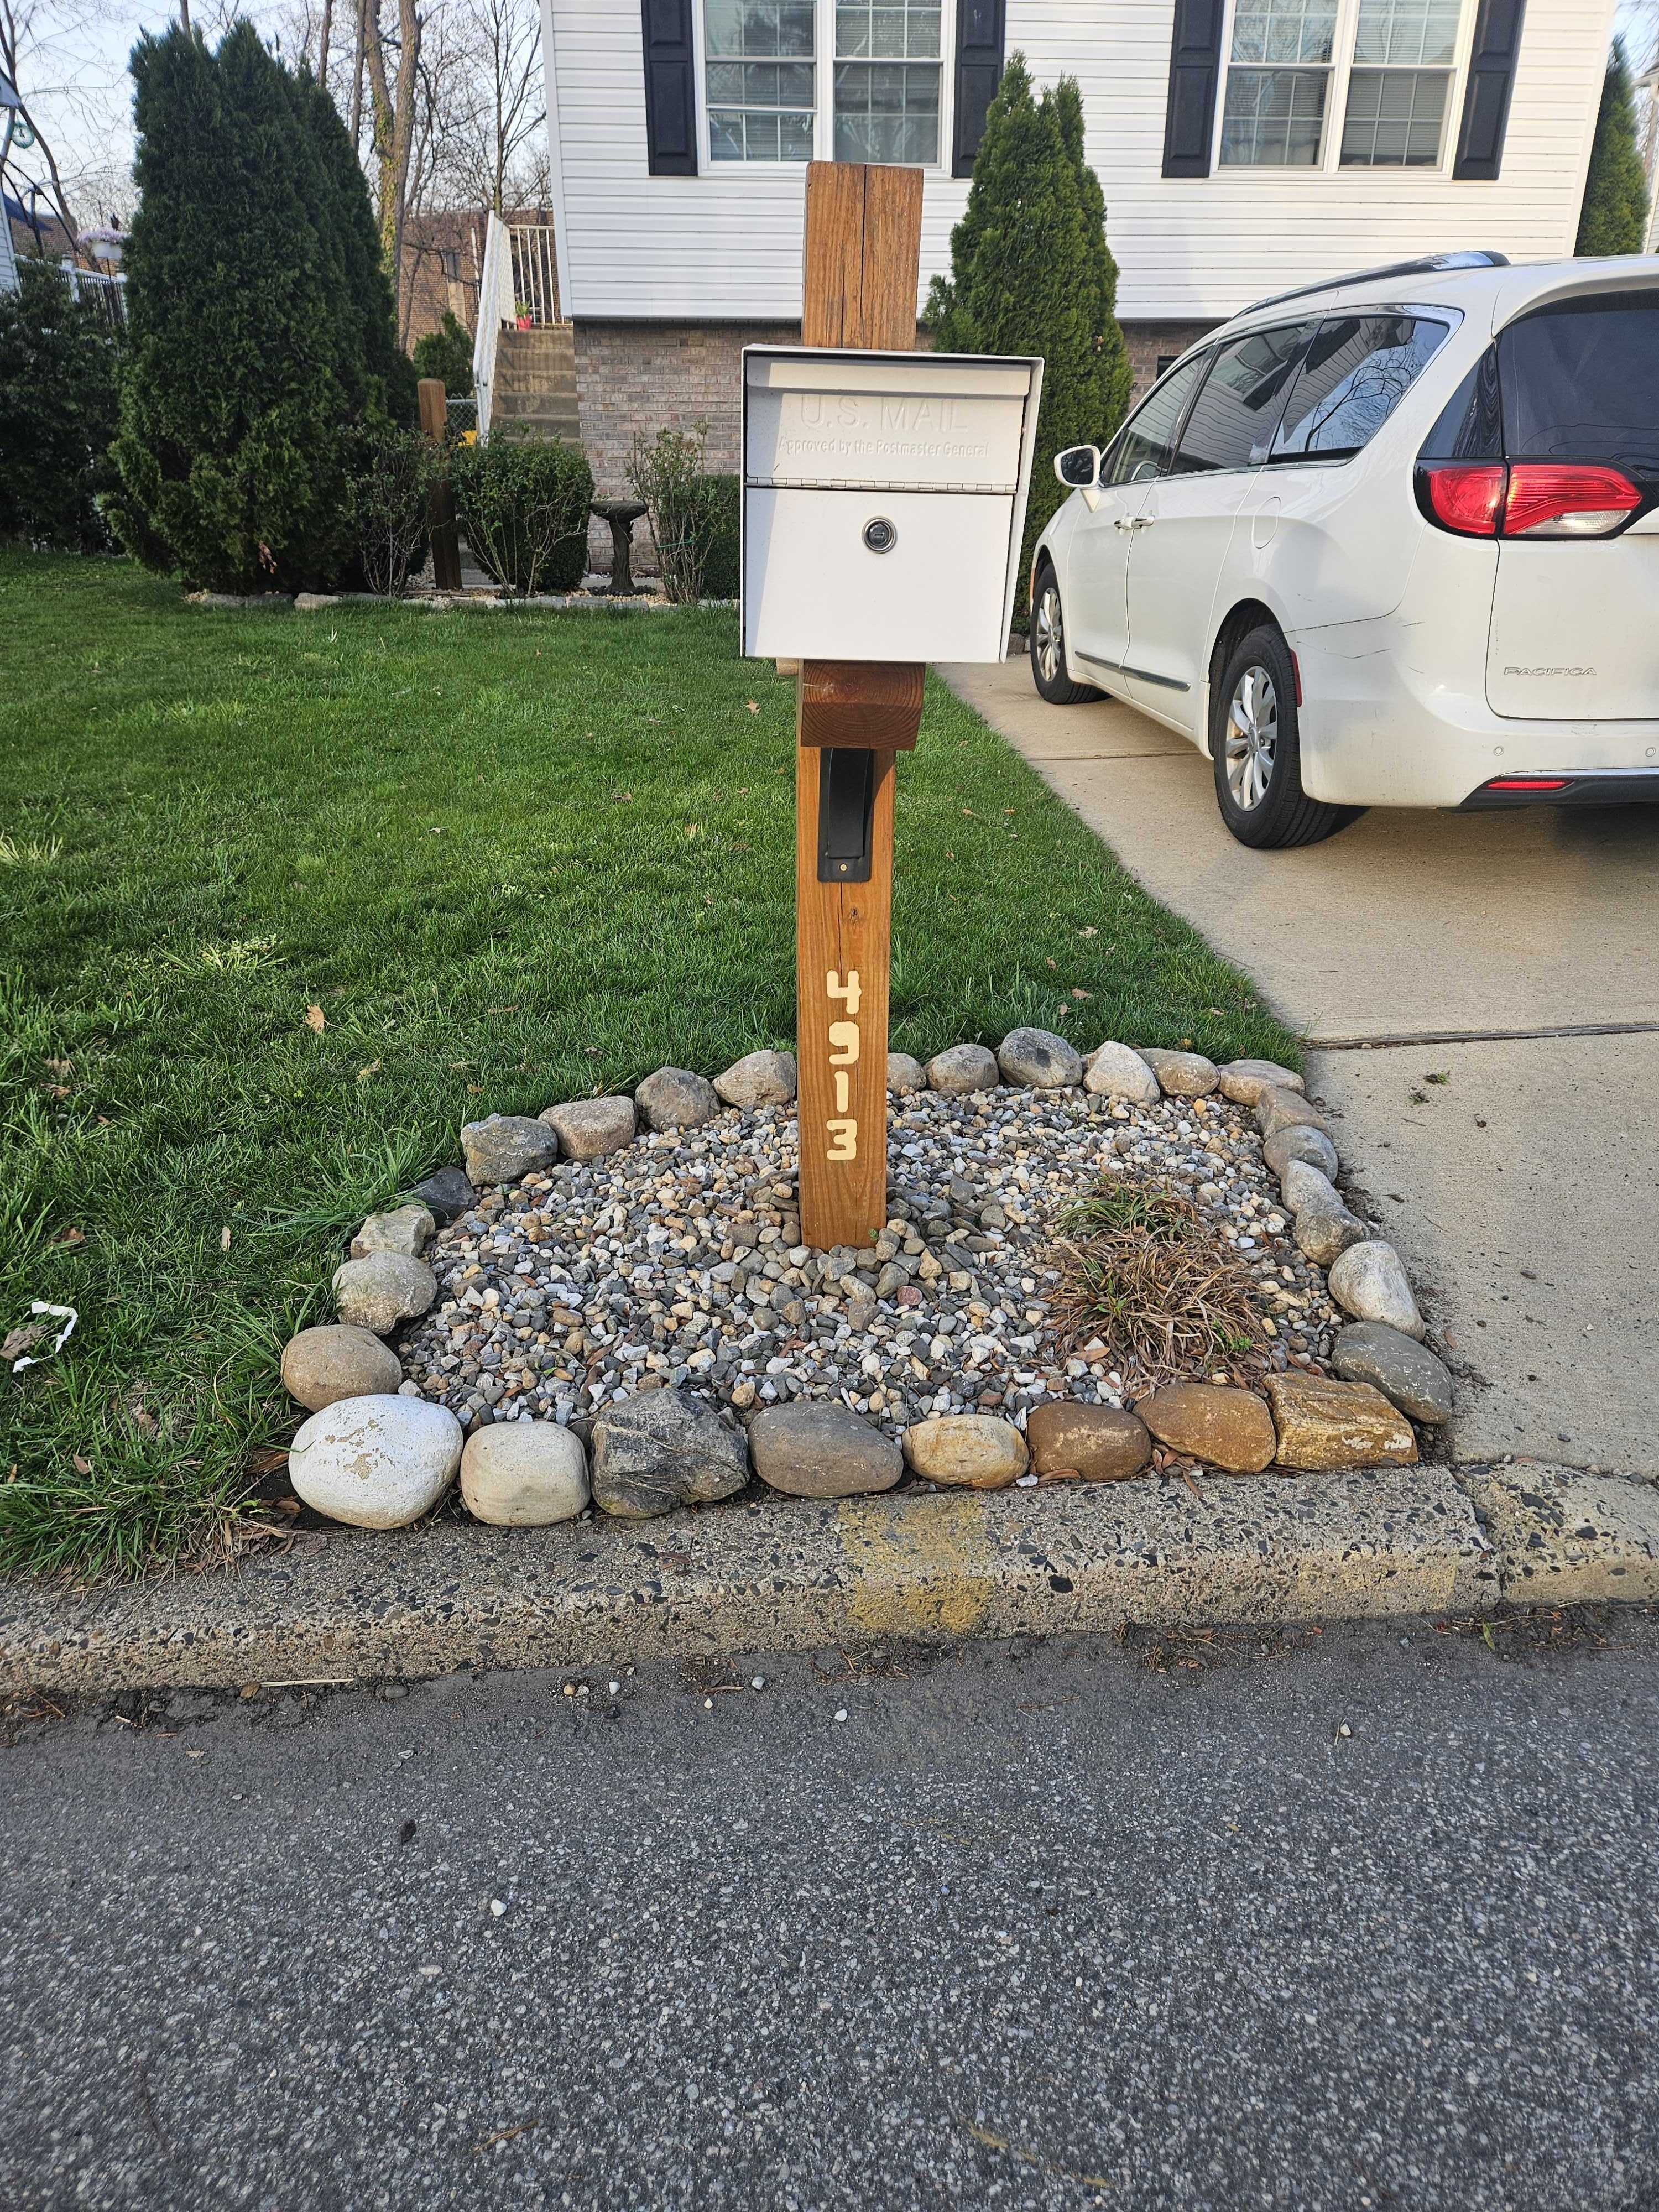
8. Installed
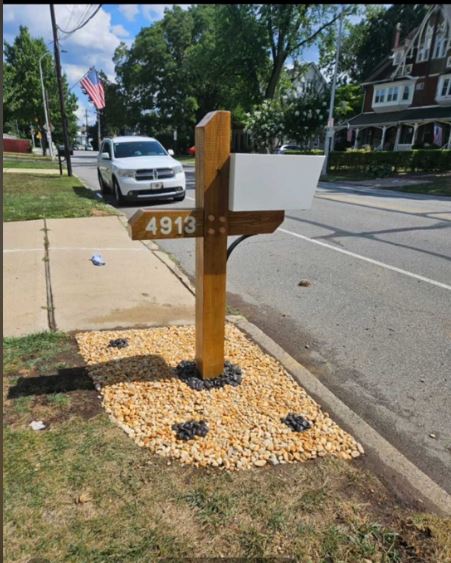
Seen from the street. The warm stain on the timber, the white mailbox on top, the sign arm reading 4913, and the gravel base with white and black stone. It looks like it belongs there.
9. The view from home
The view from the driveway — the one I see every day. The old post looked like nobody cared. This one looks different. That was the whole point.